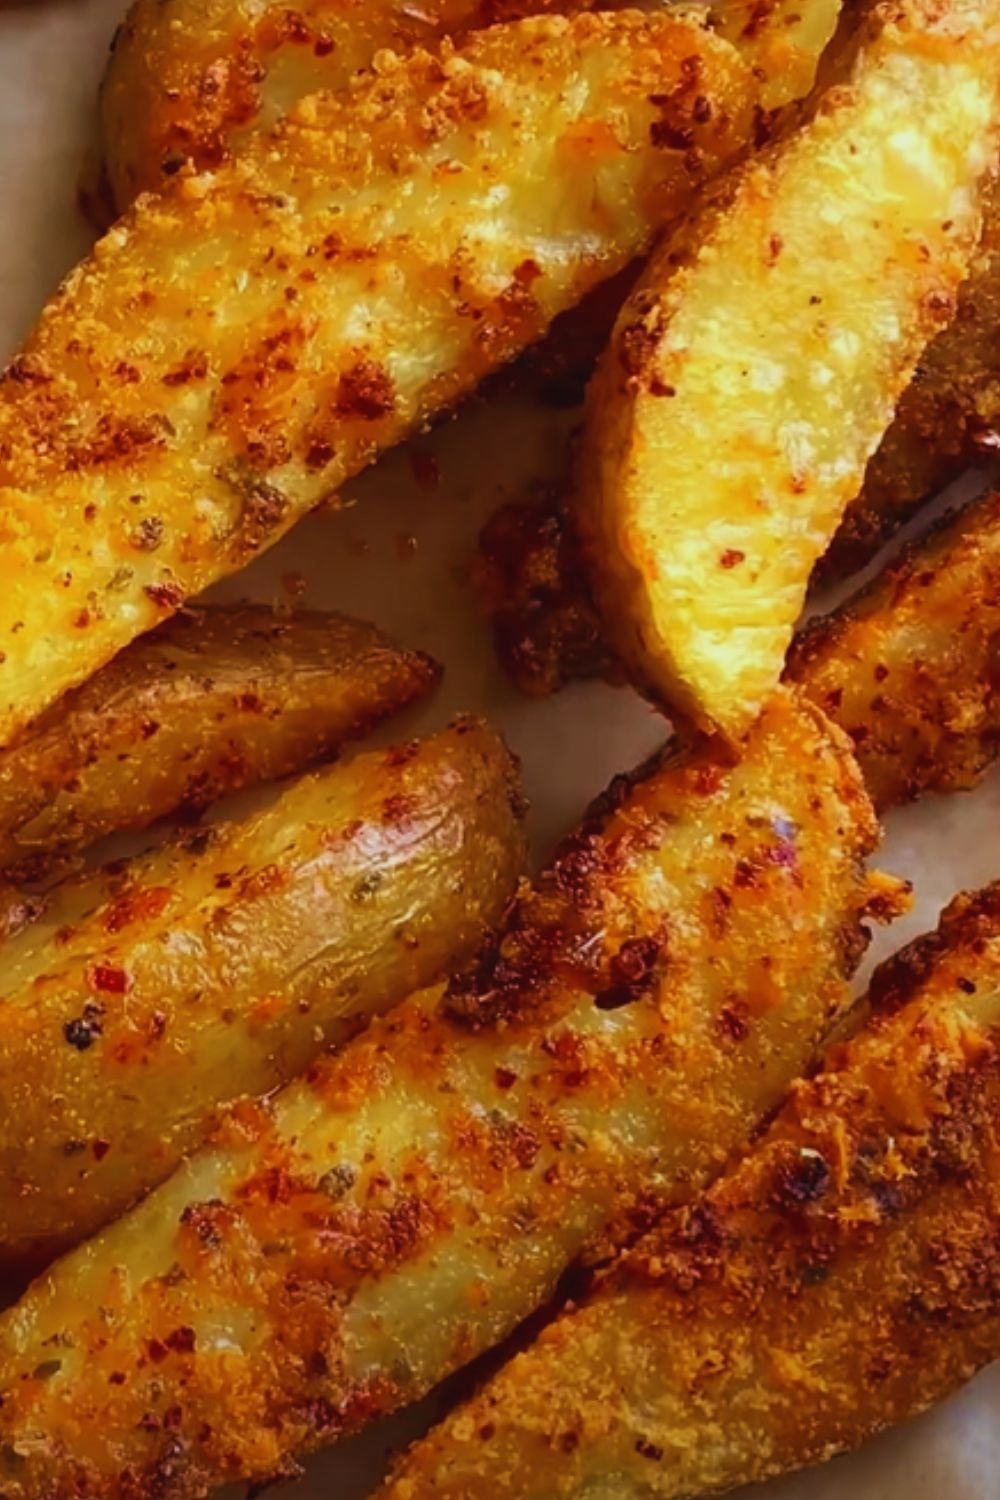
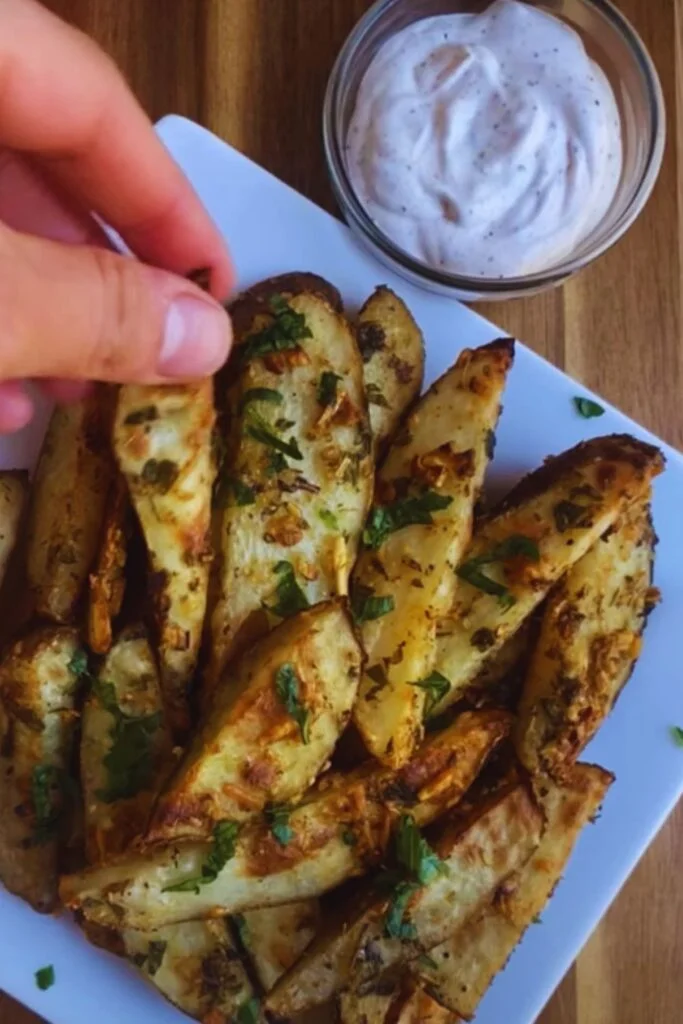
There’s something magical about the aroma of garlic and Parmesan wafting through the kitchen as potato wedges turn golden brown in the oven. I’ve been perfecting this recipe for years, and I’m excited to share my secrets for creating the most delicious, crispy-on-the-outside, fluffy-on-the-inside potato wedges that will have your family requesting them weekly.
These Baked Garlic Parmesan Potato Wedges aren’t just any side dish—they’re a celebration of simple ingredients transformed into something extraordinary. Whether you’re serving them alongside burgers, as a game day snack, or even as the star of a casual dinner, these wedges deliver restaurant-quality flavor without the deep fryer.
Why You’ll Love These Potato Wedges
Before we dive into the recipe, let me tell you why these potato wedges have become a staple in my home:
- They achieve that perfect balance of crispy exterior and fluffy interior
- The combination of garlic, Parmesan, and herbs creates layers of flavor
- Baking instead of frying means less mess and a healthier result
- They’re incredibly versatile and pair with almost anything
- You probably already have most ingredients in your pantry
- They’re a crowd-pleaser for both kids and adults
Choosing the Perfect Potatoes
The foundation of great potato wedges starts with selecting the right potatoes. I’ve experimented with various types, and here’s what I’ve discovered:
| Potato Type | Texture | Flavor | Best For | Notes |
|---|---|---|---|---|
| Russet | Fluffy interior, crispy exterior | Mild | Classic wedges | The most versatile option |
| Yukon Gold | Creamy, less fluffy | Buttery | Richer wedges | Holds shape well |
| Red Potatoes | Waxy, firmer | Slightly sweet | Softer wedges | Less crispy but flavorful |
| Sweet Potatoes | Soft, can be stringy | Sweet | Alternative version | Requires different cooking time |
| Idaho | Very starchy | Neutral | Extra crispy wedges | Similar to Russet |
For this recipe, I strongly recommend Russet potatoes. Their high starch content is the secret to achieving that perfect crispy exterior while maintaining a fluffy interior.
Ingredients You’ll Need
For about 4 generous servings, gather these ingredients:
- 4 large Russet potatoes (about 2-2.5 pounds)
- 3 tablespoons olive oil
- 4 cloves garlic, minced (about 2 tablespoons)
- 1/2 cup freshly grated Parmesan cheese
- 1 teaspoon dried oregano
- 1 teaspoon dried rosemary (or 2 teaspoons fresh, finely chopped)
- 1 teaspoon paprika (regular or smoked)
- 1/2 teaspoon garlic powder (for extra garlic flavor)
- 1/2 teaspoon onion powder
- 1/2 teaspoon salt (plus more to taste)
- 1/4 teaspoon freshly ground black pepper
- 2 tablespoons fresh parsley, chopped (for garnish)
- Optional: 1/4 teaspoon cayenne pepper (for heat lovers)
Kitchen Tools Required
You don’t need fancy equipment for this recipe:
- Sharp chef’s knife
- Cutting board
- Large mixing bowl
- Baking sheet(s)
- Parchment paper or silicone baking mat
- Measuring spoons and cups
- Spatula for flipping
- Small bowl for mixing spices
Preparation Steps
Prepping the Potatoes
- Preheat your oven to 425°F (220°C). This high temperature is crucial for achieving crispy exteriors.
- Wash and scrub the potatoes thoroughly under cold running water. I prefer leaving the skins on for extra texture and nutrients.
- Pat the potatoes dry with paper towels. This step is essential—excess moisture is the enemy of crispiness!
- Cut each potato in half lengthwise, then cut each half into 3-4 wedges, depending on the size of your potatoes. Aim for wedges that are about 1/2 inch thick at their widest part.
- Place the wedges in a large bowl of cold water and let them soak for 30 minutes. This draws out excess starch and results in crispier wedges.
- After soaking, drain the potatoes and pat them completely dry with paper towels.
Creating the Flavor Coating
While the potatoes are soaking, prepare your seasoning mixture:
- In a small bowl, combine the minced garlic, Parmesan cheese, dried oregano, rosemary, paprika, garlic powder, onion powder, salt, pepper, and cayenne (if using).
- Mix thoroughly to ensure even distribution of all seasonings.
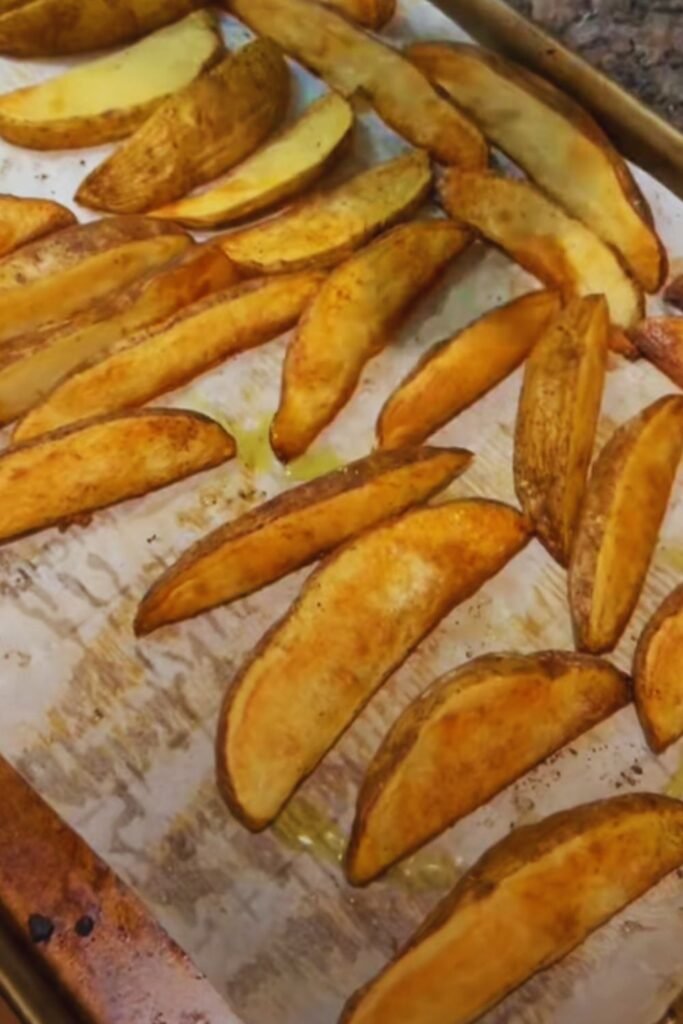
The Cooking Process
Now for the exciting part—transforming those raw potatoes into golden, flavor-packed wedges:
- Place the dried potato wedges in a large mixing bowl and drizzle with olive oil.
- Toss the wedges until they’re evenly coated with oil. I like to use my hands for this to ensure every surface gets a thin coating.
- Add the Parmesan-herb mixture to the bowl and toss again until the wedges are evenly coated. Make sure to scoop up any seasoning that falls to the bottom of the bowl and press it onto the potatoes.
- Line your baking sheet(s) with parchment paper or a silicone mat. This prevents sticking and makes cleanup easier.
- Arrange the wedges on the baking sheet in a single layer, skin-side down, making sure they don’t touch each other. Overcrowding leads to steaming rather than roasting, which prevents crispiness.
- Place the baking sheet in the preheated oven and bake for 30-35 minutes, or until the wedges are golden brown and crispy on the outside.
- About halfway through cooking (around the 15-minute mark), remove the baking sheet and carefully flip each wedge using a spatula. This ensures even browning.
- Return to the oven and continue baking until done.
My Secret Tricks for Extra Crispy Wedges
After years of making potato wedges, I’ve discovered a few tricks that make all the difference:
- The Cold Water Soak: Don’t skip this step! Soaking removes excess starch, which is the key to crispiness.
- Completely Dry Potatoes: Water creates steam, which makes wedges soggy. Take the time to thoroughly dry the wedges after soaking.
- Preheat Your Baking Sheet: Place your baking sheet in the oven while it preheats. When you arrange the wedges on a hot sheet, they start crisping immediately.
- Don’t Crowd the Pan: If necessary, use two baking sheets rather than crowding all the wedges onto one. Crowded wedges steam rather than roast.
- Position in the Oven: Place the baking sheet in the lower third of your oven for the best heat circulation.
- The Final Blast: For extra crispiness, during the last 5 minutes of baking, turn the oven to broil setting and watch carefully as the tops get extra golden (but not burnt!).
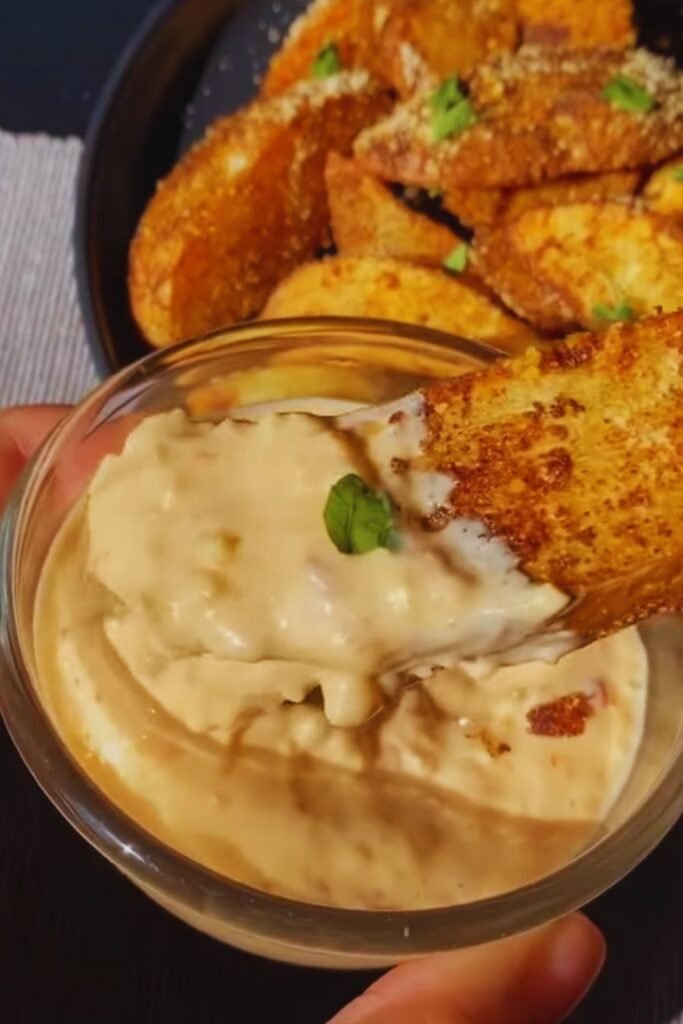
Serving Suggestions
These wedges are at their absolute best when served immediately after baking. Here are my favorite ways to enjoy them:
- With a side of homemade garlic aioli or sriracha mayo for dipping
- Alongside a juicy burger or grilled chicken
- With a fresh Greek salad for a lighter meal
- As part of a game day spread with other finger foods
- Topped with an extra sprinkle of freshly grated Parmesan and chopped parsley
For dipping sauces, try these homemade options:
| Sauce | Base Ingredients | Flavor Additions | Pairs Best With |
|---|---|---|---|
| Garlic Aioli | Mayonnaise, lemon juice | Roasted garlic, Dijon mustard | Classic wedges |
| Sriracha Mayo | Mayonnaise | Sriracha, lime juice, honey | Spicy variation |
| Herb Yogurt | Greek yogurt | Dill, parsley, chives, lemon zest | Lighter option |
| Truffle Parmesan | Mayonnaise, Parmesan | Truffle oil, black pepper | Gourmet version |
| Buffalo Blue | Sour cream, blue cheese | Hot sauce, white vinegar | Game day special |
Customizing Your Potato Wedges
The beauty of this recipe is how easily it can be customized to suit your taste preferences. Here are some delicious variations I’ve tried:
Flavor Variations
- Tex-Mex Style: Replace the Italian herbs with 1 tablespoon of taco seasoning and add 1/4 cup of grated cheddar cheese instead of Parmesan.
- Ranch Wedges: Add 2 tablespoons of powdered ranch seasoning to the spice mix.
- Spicy Cajun: Replace the herbs with 1-2 tablespoons of Cajun seasoning.
- Rosemary-Thyme: Double the rosemary and add 1 teaspoon of fresh thyme leaves for an earthy flavor profile.
- Lemon Pepper: Add 1 tablespoon of lemon zest and increase the black pepper to 1 teaspoon.
Dietary Adaptations
- Vegan Option: Omit the Parmesan cheese or replace it with nutritional yeast for a similar umami flavor.
- Lower Carb: Use turnips or radishes instead of potatoes (reduce cooking time by about 10 minutes).
- Extra Crispy Method: Coat the wedges with 1 tablespoon of cornstarch before adding the oil and seasonings.
- Oil-Free Version: Replace the oil with 2 tablespoons of aquafaba (the liquid from canned chickpeas) for a lower-fat option.
Storage and Reheating Tips
While these potato wedges are best enjoyed fresh from the oven, life happens, and sometimes you’ll have leftovers. Here’s how to store and reheat them properly:
Storage
- Allow the wedges to cool completely before storing.
- Place them in an airtight container and refrigerate for up to 3 days.
- I don’t recommend freezing cooked potato wedges as they tend to become soggy when thawed.
Reheating for Maximum Crispiness
- Oven Method (Preferred): Preheat your oven to 400°F (200°C). Arrange the wedges on a baking sheet in a single layer and bake for 10-15 minutes until heated through and crispy again.
- Air Fryer Method: Heat at 375°F (190°C) for 3-5 minutes until crispy and hot.
- Avoid Microwave: Microwaving will make your once-crispy wedges soggy and limp.
Nutritional Information
For those monitoring their intake, here’s an approximate nutritional breakdown per serving (assuming 4 servings total):
| Nutrient | Amount per Serving |
|---|---|
| Calories | 290 |
| Total Fat | 11g |
| Saturated Fat | 3g |
| Cholesterol | 10mg |
| Sodium | 390mg |
| Total Carbohydrates | 42g |
| Dietary Fiber | 3g |
| Sugars | 2g |
| Protein | 8g |
| Vitamin A | 6% DV |
| Vitamin C | 45% DV |
| Calcium | 15% DV |
| Iron | 10% DV |
Note: These values are estimates and may vary based on specific ingredients and portion sizes.
Common Troubleshooting
Even with the best instructions, things don’t always go as planned. Here are solutions to common issues:
- Wedges Not Crispy Enough: Ensure potatoes are completely dry before baking; check that your oven is properly calibrated and hot enough; avoid overcrowding the baking sheet.
- Burnt Exterior, Raw Interior: Your wedges may be cut too thick or your oven temperature may be too high. Try cutting them smaller or reducing the temperature to 400°F.
- Seasoning Doesn’t Stick: Make sure the wedges are well-coated with oil before adding seasonings. Pressing the seasonings onto the potatoes also helps.
- Too Salty: Parmesan is naturally salty, so you may need to reduce the added salt, especially if using pre-grated Parmesan which often contains additional salt.

Frequently Asked Questions
Q: Can I make these potato wedges ahead of time?
A: You can prep the potatoes (cut and soak them) up to 24 hours in advance. Store them in cold water in the refrigerator, then drain, dry thoroughly, and proceed with the recipe when ready to bake. For best results, always serve them freshly baked.
Q: Why do my potato wedges stick to the baking sheet?
A: This usually happens when the baking sheet isn’t lined with parchment paper or a silicone mat, or when the wedges aren’t properly oiled. Make sure your baking surface is lined and each wedge has a light coating of oil.
Q: Can I use different potatoes if I don’t have Russets?
A: Yes, you can substitute Yukon Gold or Idaho potatoes, though the texture will be slightly different. Waxy potatoes like red or new potatoes won’t get as crispy but will still taste delicious.
Q: How can I make these wedges even healthier?
A: You can reduce the oil to 2 tablespoons, use less Parmesan cheese, or try an air fryer if you have one (cook at 380°F for about 20 minutes, flipping halfway through).
Q: My family doesn’t like garlic. Can I omit it?
A: Absolutely! The recipe is very flexible. You can omit the garlic entirely or substitute with other herbs and spices you enjoy.
Q: How do you get the Parmesan cheese to not burn?
A: The key is using finely grated (not shredded) Parmesan and mixing it well with the other seasonings. The oil coating helps protect it, and flipping the wedges halfway through cooking ensures even browning.
Q: Can I use these same seasonings on sweet potatoes?
A: Yes, this seasoning blend works wonderfully with sweet potatoes too! Just note that sweet potatoes may cook a bit faster due to their natural sugar content, so start checking them about 5 minutes earlier.
Q: The recipe calls for fresh garlic. Can I use garlic powder instead?
A: Yes, you can substitute the 4 cloves of fresh garlic with 1 teaspoon of garlic powder (in addition to the 1/2 teaspoon already in the recipe).
Why This Recipe Works
After countless batches of potato wedges (and happy dinner guests), I’ve identified exactly why this approach delivers consistently excellent results:
- The Cold Water Soak: This seemingly simple step makes a profound difference by removing excess starch from the surface of the potatoes, allowing them to crisp up beautifully.
- High-Temperature Baking: The 425°F oven provides the right environment for developing that golden exterior without drying out the inside.
- The Garlic-Parmesan Coating: Beyond just flavor, the Parmesan cheese actually contributes to the crispiness as it bakes and forms a delicious crust.
- Proper Spacing: Giving each wedge its own space on the baking sheet ensures hot air circulates around all sides for even browning.
- The Mid-Bake Flip: Taking a moment to flip the wedges halfway through cooking makes sure both sides get equally crispy.
The result is a side dish that rivals anything you’d get at a restaurant—crispy, flavorful, and surprisingly easy to make at home.
I hope you enjoy these Baked Garlic Parmesan Potato Wedges as much as my family does. They’ve become our go-to side dish for everything from casual weeknight dinners to special occasions. Once you master this basic recipe, feel free to experiment with different herbs and spices to make it your own!
Q&A Section
Q: What’s the most important tip for really crispy potato wedges?
A: The single most important tip is thoroughly drying the potatoes after soaking them. Any excess moisture will create steam in the oven, which prevents crispiness. I pat them dry with paper towels, then let them air dry for about 5 minutes before adding the oil and seasonings.
Q: Do I need to use fresh Parmesan, or can I use the pre-grated kind in the green container?
A: While you can use the pre-grated Parmesan in a pinch, freshly grated Parmesan will give you significantly better flavor and texture. The pre-grated kind contains anti-caking agents that can affect how it melts and adheres to the potatoes. If possible, buy a block of Parmesan and grate it yourself just before using.
Q: My oven tends to heat unevenly. Any suggestions?
A: Absolutely! Rotate your baking sheet 180 degrees when you flip the wedges halfway through cooking. If you have a convection setting on your oven, that’s ideal for these wedges as it circulates hot air more evenly. If using convection, reduce the temperature by 25°F and check for doneness a few minutes earlier.
Q: Can this recipe be doubled for a larger crowd?
A: Yes, you can easily double or even triple this recipe. The key is using enough baking sheets so the wedges remain in a single layer without touching. You may need to bake in batches or use multiple racks in your oven (rotate the sheets between racks halfway through baking).
Q: I’m watching my sodium intake. How can I make these less salty?
A: There are several ways to reduce sodium: omit the added salt entirely (the Parmesan provides saltiness already), use a reduced-sodium alternative like potassium chloride, or use less Parmesan and compensate with extra herbs for flavor. You can also try nutritional yeast, which provides a cheese-like flavor with less sodium.
Q: How do restaurants get their potato wedges so crispy?
A: Many restaurants actually double-fry their potato wedges, which isn’t practical for most home cooks. Our method of soaking, thoroughly drying, and baking at a high temperature replicates much of that crispiness without the extra oil. The pre-heated baking sheet trick also helps achieve that restaurant-quality texture.