Have you ever craved something decadently chocolatey but didn’t want to turn on your oven? I’ve got you covered with this incredibly simple no-bake Nutella cheesecake that requires just 6 ingredients and about 20 minutes of active preparation time. The hardest part is waiting for it to set!
I’ve been perfecting this recipe for years, and it’s become my go-to dessert for gatherings because it’s virtually impossible to mess up. Plus, that silky-smooth chocolate hazelnut flavor combined with the creamy cheesecake texture creates a dessert that people will think you spent hours making.
Why You’ll Love This Recipe
This no-bake Nutella cheesecake has become my signature dessert for several compelling reasons:
- Incredibly simple – just 6 ingredients and no baking required
- Make-ahead friendly – perfect for preparing a day before your event
- Consistently impressive – looks and tastes like it came from a gourmet bakery
- Customizable – easy to adapt with different toppings or crust options
- Foolproof – even novice dessert makers can create this successfully
Ingredients You’ll Need
For this recipe, quality matters, but you don’t need anything fancy or hard to find:
| Ingredient | Amount | Notes |
|---|---|---|
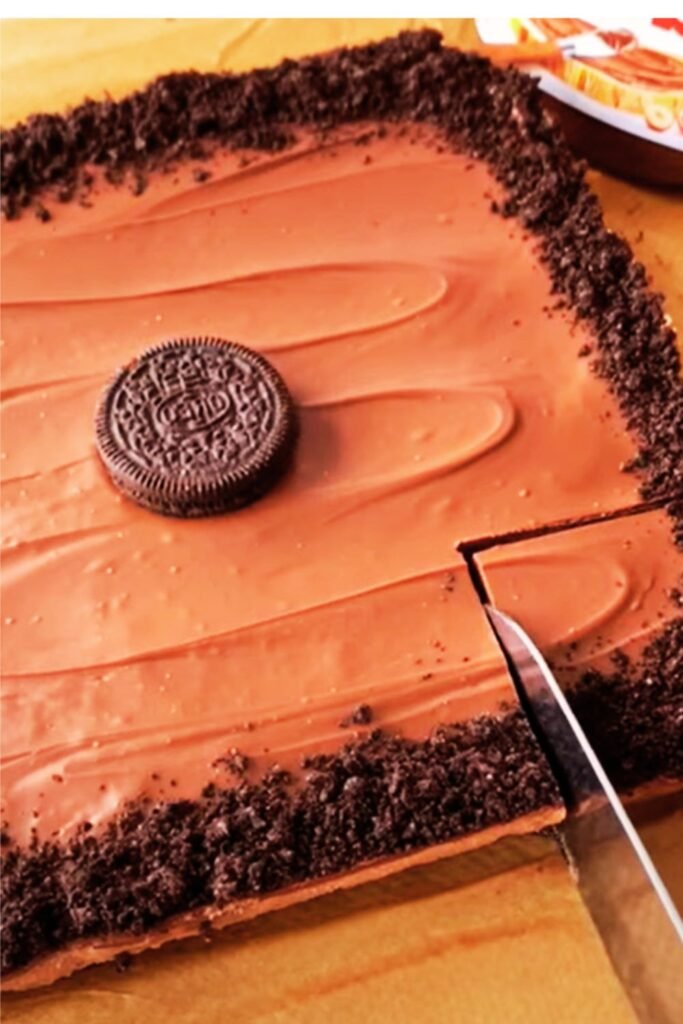
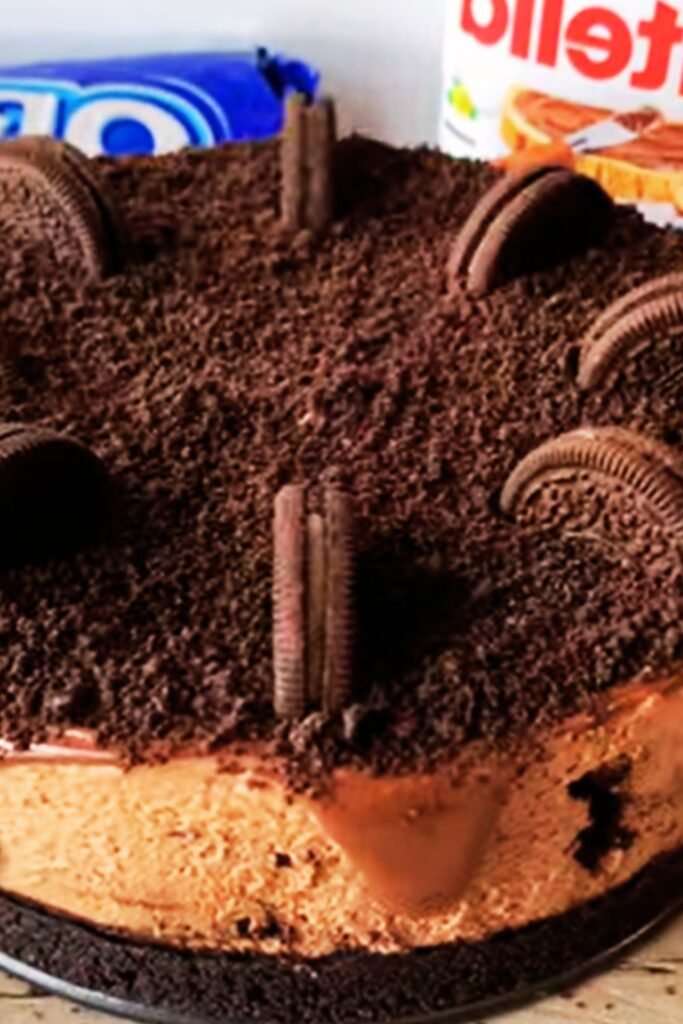
| Oreo cookies | 24 cookies (about 275g) | Regular, not Double Stuff for the crust |
| Unsalted butter | 5 tablespoons (70g) | Melted |
| Cream cheese | 16 ounces (450g) | Full-fat, room temperature |
| Nutella | 1 cup (300g) | Room temperature for easier mixing |
| Heavy cream | 1 cup (240ml) | Cold |
| Powdered sugar | 1/4 cup (30g) | Sifted to avoid lumps |
Optional Toppings:
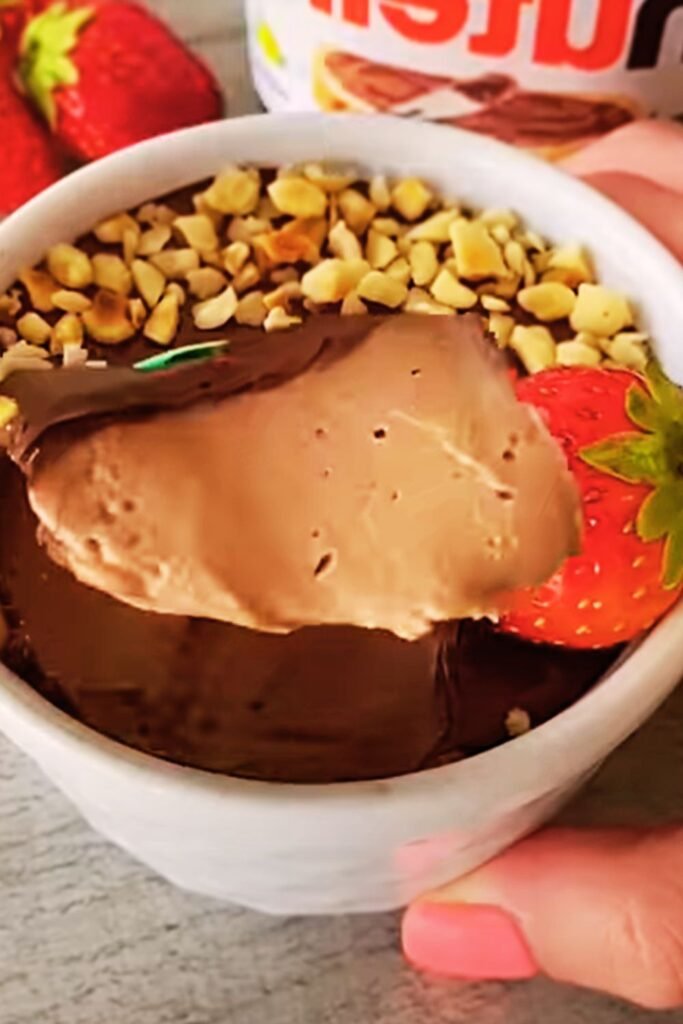
- Chopped hazelnuts
- Chocolate shavings
- Fresh raspberries or strawberries
- Additional Nutella for drizzling
- Whipped cream
Essential Equipment
You don’t need special equipment, but these basics will make your life easier:
- 9-inch (23cm) springform pan
- Food processor (for the crust)
- Electric mixer (stand or handheld)
- Rubber spatula
- Measuring cups and spoons
Step-by-Step Instructions
Preparing the Crust
- Line the bottom of your springform pan with parchment paper for easier removal later.
- Place the Oreo cookies (whole, including filling) in a food processor and pulse until you have fine crumbs.
- Transfer the crumbs to a bowl and pour in the melted butter.
- Mix until the crumbs are evenly moistened and resemble wet sand.
- Press the mixture firmly into the bottom of your prepared springform pan, creating an even layer.
- Place the crust in the refrigerator to chill while you prepare the filling.
Making the Cheesecake Filling
- In a large bowl, beat the room-temperature cream cheese until smooth and creamy, about 2-3 minutes. Make sure there are no lumps.
- Add the Nutella to the cream cheese and beat until fully incorporated and the mixture is uniform in color.
- In a separate bowl, whip the cold heavy cream and powdered sugar until stiff peaks form.
- Gently fold the whipped cream into the Nutella-cream cheese mixture using a rubber spatula. Do this gradually and with a light hand to maintain as much air in the mixture as possible.
- Continue folding until the mixture is uniform in color with no streaks remaining.
Assembling and Chilling
- Remove the crust from the refrigerator and pour the cheesecake filling over it, spreading it into an even layer.
- Smooth the top with a spatula or the back of a spoon.
- Cover the pan with plastic wrap or aluminum foil.
- Refrigerate for at least 6 hours, but preferably overnight (12-24 hours). This setting time is non-negotiable for the perfect texture!
Serving Suggestions
When you’re ready to serve this luscious dessert, try these presentation ideas:
- Run a thin knife around the edge of the pan before releasing the springform.
- Transfer the cheesecake to a serving plate.
- Garnish just before serving with any of these options:
- A drizzle of slightly warmed Nutella (10 seconds in the microwave makes it perfect for drizzling)
- A generous sprinkle of chopped hazelnuts
- Chocolate shavings or curls
- A border of fresh berries around the edge
- Whipped cream dollops around the perimeter
- A light dusting of cocoa powder
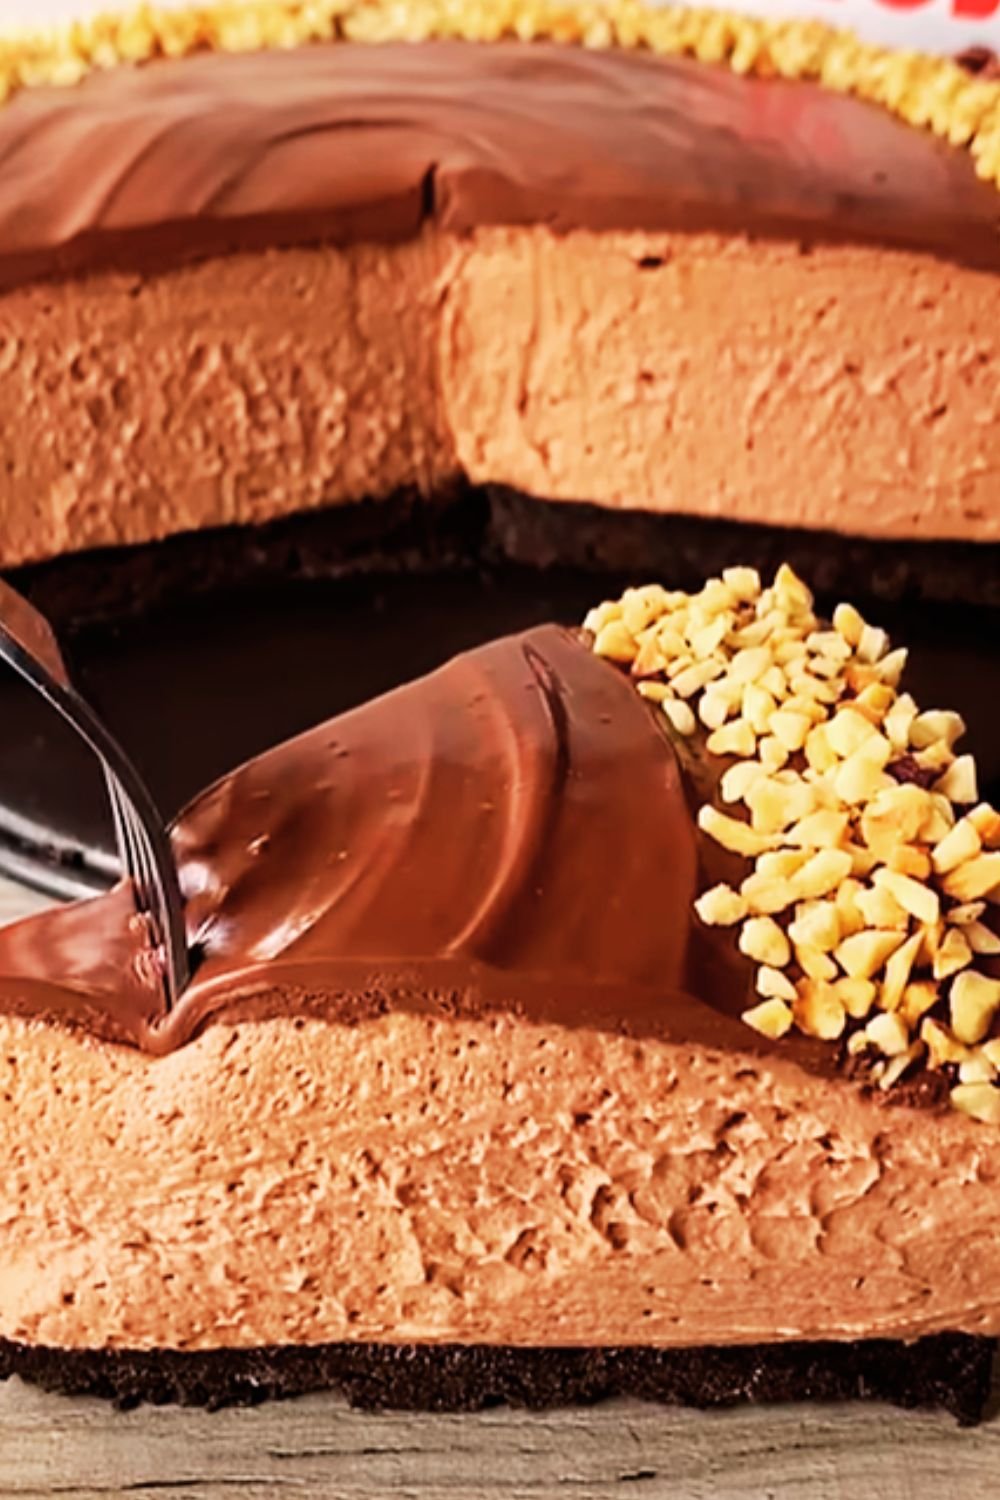
I often serve mine with a combination of all three – chocolate shavings, hazelnuts, and a few fresh berries for color contrast. The visual impact is stunning against the deep chocolate color of the cheesecake.
Make-Ahead and Storage Tips
This cheesecake is perfect for planning ahead:
Make-Ahead Options:
- Prepare 1-2 days in advance: This cheesecake actually improves with time in the refrigerator, as the flavors meld and deepen.
- Freeze for up to 2 months: Wrap the fully set cheesecake (without toppings) in a double layer of plastic wrap and then aluminum foil.
Storage Guidelines:
| Storage Method | Duration | Notes |
|---|---|---|
| Refrigerator | Up to 5 days | Cover with plastic wrap or in an airtight container |
| Freezer | Up to 2 months | Double-wrap and thaw overnight in the refrigerator |
| Room temperature | Max 2 hours | For serving only |
Thawing Instructions:
For frozen cheesecake, thaw overnight in the refrigerator. Add toppings only after thawing for the best presentation.
Recipe Variations
While the classic version is divine, I’ve experimented with several variations over the years:
Different Crusts:
- Graham cracker crust: Replace Oreos with 2 cups graham cracker crumbs and increase butter to 7 tablespoons
- Digestive biscuit crust: Perfect for an international twist
- Hazelnut crust: Add 1/2 cup ground hazelnuts to the Oreo crumbs for extra nuttiness
Flavor Twists:
- Salted Nutella: Add 1/2 teaspoon sea salt to the filling for a sweet-salty balance
- Espresso-Nutella: Dissolve 1 tablespoon instant espresso powder in 1 tablespoon hot water and cool before adding to the filling
- Raspberry-Nutella: Swirl 1/4 cup raspberry preserves through the filling before chilling
- Baileys-Nutella: Replace 2 tablespoons of heavy cream with Baileys Irish Cream for an adult version
Size Adjustments:
| Pan Size | Ingredient Multiplier | Setting Time |
|---|---|---|
| 6-inch | 0.5x recipe | 4-6 hours |
| 12-inch | 1.5x recipe | 8-10 hours |
| Mini (cupcake size) | Same amount, makes ~24 | 3-4 hours |
Troubleshooting Tips
Even though this recipe is nearly foolproof, here are solutions to potential issues:
Common Problems and Solutions:
- Filling too soft: Likely causes include not whipping the cream enough, overmixing after adding whipped cream, or not chilling long enough. Solution: Return to refrigerator for several more hours.
- Crust crumbles when slicing: The crust might not have enough butter or wasn’t pressed firmly enough. Solution: Next time, add an extra tablespoon of butter and use the bottom of a measuring cup to really compact the crust.
- Filling has lumps: Room temperature cream cheese is essential. Solution: If you see lumps forming, pause and let the cream cheese warm up more before continuing to beat.
- Cheesecake sticks to the pan: Always line with parchment and run a warm knife around the edge before releasing the springform. Solution: Dip your knife in hot water, then dry it, before sliding it around the edge.
Nutritional Information
For those tracking nutritional content, here’s an approximate breakdown per slice (assuming 12 slices per cheesecake):
| Nutrient | Amount per Slice |
|---|---|
| Calories | 420 |
| Total Fat | 32g |
| Saturated Fat | 18g |
| Cholesterol | 75mg |
| Sodium | 230mg |
| Total Carbohydrates | 34g |
| Dietary Fiber | 2g |
| Sugars | 26g |
| Protein | 5g |
Expert Tips for Perfect Results
After making this cheesecake dozens of times, I’ve discovered some key secrets:
- Temperature matters: Room temperature cream cheese and Nutella blend more smoothly, while cold heavy cream whips better.
- Don’t rush the setting: The full overnight chill makes an enormous difference in the final texture.
- The folding technique: Use a cutting motion down the center, then scrape the sides and bottom, rotating the bowl as you go. This preserves the air in the whipped cream.
- Cutting clean slices: Dip your knife in hot water and wipe clean between each cut for bakery-worthy presentation.
- The taste test: This cheesecake tastes best when it’s slightly less cold than refrigerator temperature, so let it sit for about 15-20 minutes before serving.
Frequently Asked Questions
Q: Can I use light cream cheese instead of full-fat?
While you technically can, I strongly advise against it. The full-fat version provides the proper structure and creaminess. Light cream cheese contains more water, which can prevent your cheesecake from setting properly and may result in a softer, less stable texture.
Q: Do I have to use a springform pan?
A springform pan makes removal and serving much easier, but you could use a regular 9-inch cake pan lined with parchment paper that extends up the sides as “handles” to lift out the cheesecake. You could also make this in a square pan and cut into bars.
Q: Can I make this dairy-free?
I haven’t perfected a dairy-free version yet, but you could experiment with dairy-free cream cheese and coconut cream (the thick part from a can of full-fat coconut milk) instead of heavy cream. The texture will be different, but still delicious.
Q: Is there a way to reduce the sweetness?
Yes! You can reduce the powdered sugar completely or use dark chocolate Nutella if you can find it. The Oreo crust also contributes sweetness, so you could switch to a graham cracker or digestive biscuit crust with less sugar added.
Q: How far in advance can I make this cheesecake?
This cheesecake can be made up to 2 days in advance and kept in the refrigerator, or up to 2 months in advance if stored in the freezer. Just add any fresh toppings right before serving.
Q: Can I use homemade chocolate hazelnut spread instead of Nutella?
Absolutely! Homemade chocolate hazelnut spread works beautifully. Just ensure it has a similar consistency to Nutella for proper setting.
Q: Why is my filling not firm enough?
There are a few possible reasons: the heavy cream wasn’t whipped to stiff peaks, the mixture was overmixed after adding the whipped cream (deflating the air), or it simply needs more chilling time. Try returning it to the refrigerator for a few more hours.
Q: Can I make individual mini cheesecakes instead?
Yes! This recipe works wonderfully for individual servings. Use a muffin tin lined with paper liners or a mini cheesecake pan. They’ll set faster – usually in about 3-4 hours.
The History Behind This Recipe
I first discovered my love for Nutella cheesecake during a trip to Italy, where I tasted a version in a small family-run pasticceria in Naples. The owner noticed my enthusiasm and shared some basic instructions, which I’ve adapted and simplified over the years.
What started as an attempt to recreate that Italian memory has evolved into this foolproof version that combines the best of American cheesecake texture with Italian hazelnut-chocolate flavors. I’ve made it for countless birthdays, holidays, and dinner parties, and it’s never failed to impress.
The beauty of this particular recipe is how it balances richness with airiness. Many no-bake cheesecakes can be too dense or too mousse-like, but this one strikes the perfect balance, creating a silky texture that melts in your mouth while still holding its shape when sliced.
Final Thoughts
This no-bake Nutella cheesecake represents everything I love about home baking – it’s impressively delicious without being technically difficult. The combination of chocolate, hazelnuts, and creamy cheesecake creates something far greater than the sum of its parts.
What I find most rewarding is watching someone take their first bite and seeing their eyes widen with pleasure. That’s the magic of a really good dessert – it creates moments of pure joy that bring people together.
Whether you’re making this for a special occasion or just because it’s Wednesday and you deserve something wonderful, I hope this cheesecake brings as much happiness to your table as it has to mine. Happy no-baking!