There’s something magical about the aroma of garlic bread wafting through the kitchen. That buttery, garlicky scent instantly makes my mouth water and transports me back to countless family dinners where this simple side dish stole the show. The best part? You don’t need to be a culinary genius or spend hours in the kitchen to create this crowd-pleaser. Today, I’m sharing my foolproof 15-minute garlic bread recipe that delivers restaurant-quality results with minimal effort.
Why This 15-Minute Garlic Bread Recipe Works
Before diving into the recipe, let me explain why this particular approach stands out from the countless garlic bread recipes you might find online:
- Speed Without Sacrifice: Many quick recipes cut corners on flavor. This one doesn’t.
- Balanced Flavor Profile: The perfect ratio of butter, garlic, and herbs creates a harmonious taste experience.
- Versatile Texture Options: Whether you prefer soft and buttery or crispy and crunchy, I’ve got you covered.
- Foolproof Method: Even if you’re a complete beginner in the kitchen, you’ll nail this on your first try.
When I first started making garlic bread, I was intimidated by recipes that called for fancy ingredients or complicated techniques. Through years of trial and error, I’ve stripped away the unnecessary steps while preserving all the flavor, resulting in this 15-minute wonder that has become my signature side dish.
Ingredients You’ll Need
The beauty of great garlic bread lies in its simplicity. You’ll only need a handful of ingredients, most of which are probably already in your pantry:
| Ingredient | Quantity | Notes |
|---|---|---|
| French or Italian bread | 1 loaf | Approximately 18-24 inches long |
| Unsalted butter | 1/2 cup (1 stick) | Softened at room temperature |
| Fresh garlic | 4-6 cloves | Minced (adjust according to your garlic preference) |
| Fresh parsley | 2 tablespoons | Finely chopped (dried can work in a pinch) |
| Kosher salt | 1/4 teaspoon | Enhances the flavors |
| Parmesan cheese | 1/4 cup | Freshly grated (optional but recommended) |
| Dried oregano | 1/2 teaspoon | For an Italian flavor boost (optional) |
| Red pepper flakes | 1/4 teaspoon | For a subtle heat (optional) |
Equipment Needed
One of the reasons this recipe is so approachable is that it requires minimal equipment:
- Oven or broiler
- Baking sheet
- Aluminum foil
- Small mixing bowl
- Cutting board and knife
- Garlic press (optional but helpful)
- Butter knife or spatula
The 15-Minute Method
Now, let’s break down the process step by step. I’ve timed this countless times, and if you have your ingredients ready, you can absolutely complete it within 15 minutes.
Step 1: Prep (2 minutes)
- Preheat your oven to 400°F (200°C) or set your broiler to high.
- Line a baking sheet with aluminum foil for easy cleanup.
- Slice your bread loaf in half horizontally to create two long pieces.
Step 2: Create the Garlic Butter Spread (5 minutes)
In a small bowl, combine:
- The softened butter
- Minced garlic
- Chopped parsley
- Salt
- Parmesan cheese (if using)
- Oregano (if using)
- Red pepper flakes (if using)
Mix thoroughly until all ingredients are well incorporated. The butter should look speckled with herbs and garlic.
Step 3: Apply and Bake (8 minutes)
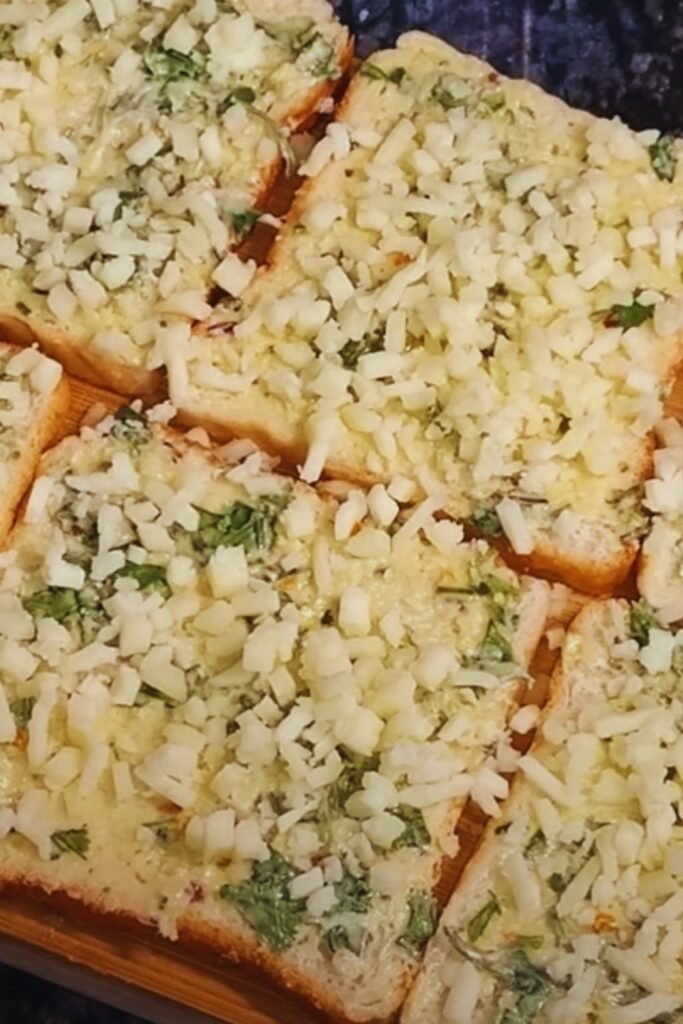
- Using a butter knife or spatula, spread the garlic butter mixture generously over the cut sides of your bread halves. Make sure to spread it evenly from edge to edge.
- Place the bread butter-side up on your prepared baking sheet.
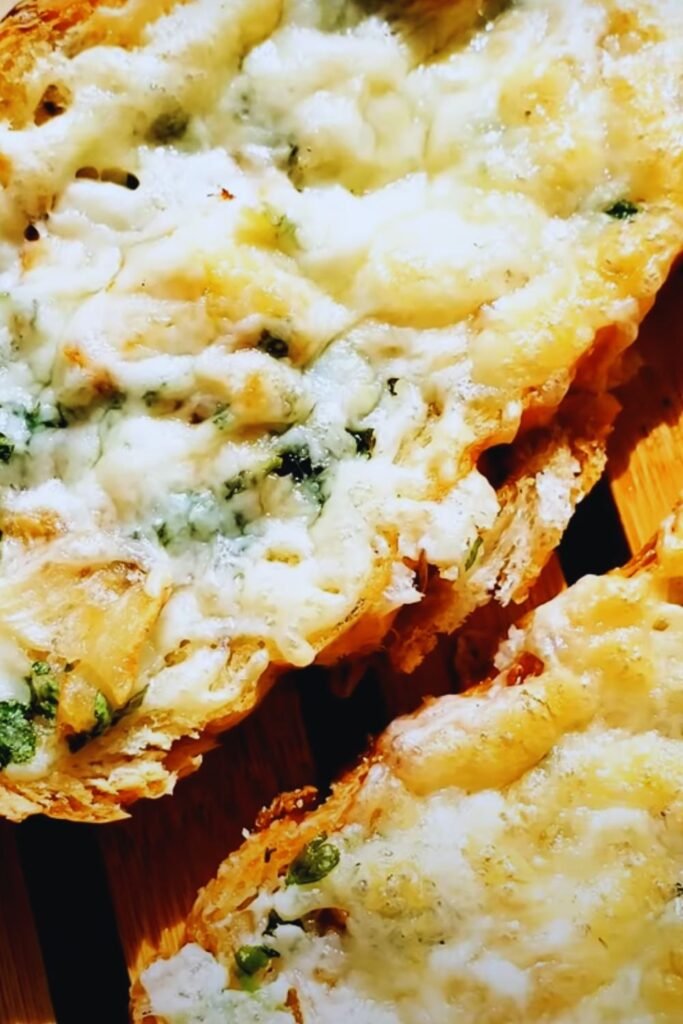
- For soft garlic bread: Bake at 400°F for 8-10 minutes until the butter is melted and the edges are just beginning to brown.
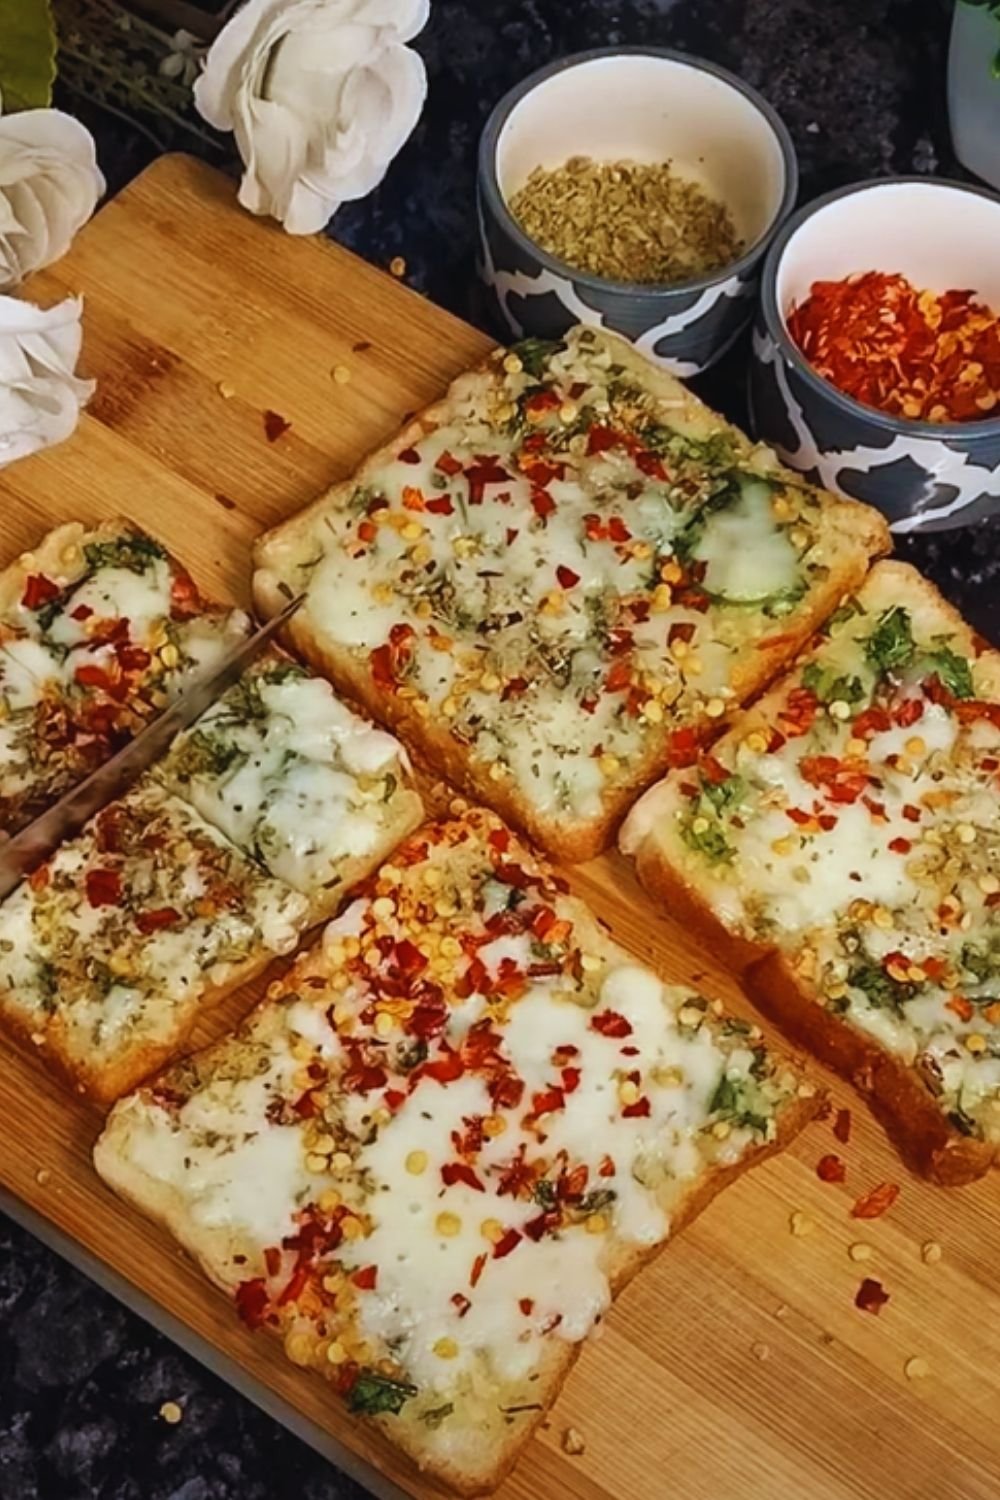
- For crispy garlic bread: Place under the broiler for 2-3 minutes, watching carefully to prevent burning. The bread should turn golden brown and slightly crispy around the edges.
Step 4: Serve (1 minute)
Remove from the oven, let cool for just a minute (to prevent burned mouths!), then slice into portions and serve immediately.
Flavor Variations to Try
While the classic recipe above is my go-to, I sometimes like to experiment with different flavor profiles. Here are some of my favorite variations:
| Variation | Additional Ingredients | Flavor Profile |
|---|---|---|
| Cheesy Garlic Bread | Add 1 cup shredded mozzarella over the butter before baking | Gooey, stretchy, perfect for pizza night |
| Herb Garden | Add 1 tsp each of fresh thyme, rosemary, and basil to the butter | Fresh, aromatic, great with pasta |
| Roasted Garlic | Replace fresh garlic with 1 head of roasted garlic | Sweet, mellow, less pungent |
| Mediterranean | Add 2 tbsp chopped sun-dried tomatoes and 2 tbsp chopped olives | Tangy, briny, excellent with Greek dishes |
| Spicy Kick | Double the red pepper flakes and add a dash of cayenne | Fiery, warming, pairs well with hearty soups |
Common Mistakes to Avoid
Even though this recipe is simple, there are a few pitfalls that can affect your results:
- Using cold butter: Always ensure your butter is properly softened for easy spreading and even distribution of flavors.
- Burning the garlic: If you’re using the broiler method, keep a close eye on your bread. Garlic can go from perfectly golden to bitter and burnt in seconds.
- Skimping on the spread: Be generous with your garlic butter mixture. It’s what delivers all that wonderful flavor!
- Cutting the bread too thin: Make sure your bread halves have enough substance to support the garlic butter without becoming soggy.
- Serving lukewarm: Garlic bread is at its absolute best when served hot from the oven. Plan your timing accordingly.
Make-Ahead and Storage Tips
While garlic bread is best enjoyed fresh, there are ways to prep ahead or save leftovers:
Make-Ahead Options:
- Prepare the garlic butter mixture up to 3 days in advance and store it in an airtight container in the refrigerator. Allow it to soften before spreading.
- Assemble the unbaked garlic bread, wrap it tightly in plastic wrap, and refrigerate for up to 24 hours before baking.
- Freeze assembled unbaked garlic bread for up to 3 months. Wrap in plastic, then foil, and freeze. Bake from frozen, adding 5-7 minutes to the cooking time.
Storage Solutions:
| Storage Method | Duration | Reheating Instructions | Quality Notes |
|---|---|---|---|
| Room Temperature | 2-3 hours | Wrap in foil and warm at 350°F for 5 minutes | Best eaten same day |
| Refrigerator | 2-3 days | Wrap in foil and warm at 350°F for 8-10 minutes | Texture will suffer slightly |
| Freezer | 1-2 months | Wrap in foil and bake at 350°F for 15-20 minutes | Use for garlic croutons if too dry |
Nutritional Information
For those who are mindful of their dietary intake, here’s an approximate nutritional breakdown per serving (assuming the loaf yields 12 servings):
| Nutrient | Amount | % Daily Value* |
|---|---|---|
| Calories | 175 | – |
| Total Fat | 9g | 12% |
| Saturated Fat | 5g | 25% |
| Cholesterol | 20mg | 7% |
| Sodium | 350mg | 15% |
| Total Carbohydrate | 20g | 7% |
| Dietary Fiber | 1g | 4% |
| Sugars | 1g | – |
| Protein | 4g | 8% |
*Percent Daily Values are based on a 2,000 calorie diet.
Serving Suggestions
Garlic bread is versatile enough to complement nearly any meal, but here are some of my favorite pairings:
- Italian Classics: Spaghetti and meatballs, lasagna, or any pasta dish with red sauce
- Soups: Particularly tomato, minestrone, or creamy vegetable soups
- Salads: Turn a simple Caesar salad into a complete meal
- Grilled Meats: The perfect side for a backyard barbecue
- On Its Own: Let’s be honest, sometimes I make this as a snack with nothing else!
Why Homemade Garlic Bread Beats Store-Bought Every Time
I used to grab those foil-wrapped garlic breads from the freezer section of the grocery store. They seemed convenient, but once I started making my own, I realized how much I’d been missing:
| Aspect | Homemade | Store-Bought |
|---|---|---|
| Ingredients | Fresh, pronounceable ingredients | Often contains preservatives and artificial flavors |
| Garlic Flavor | Fresh, aromatic, authentic | Sometimes has a processed or artificial taste |
| Butter Quality | Real butter, as much or as little as you like | Often uses lower-quality fats or butter substitutes |
| Customization | Endless variations to suit your taste | One-size-fits-all approach |
| Cost | Approximately $2-3 per loaf | $4-6 per comparable loaf |
| Freshness | Hot and fresh from your oven | Previously frozen, never quite as fresh |
Frequently Asked Questions
Over the years, I’ve received many questions about this recipe. Here are the most common ones:
Q: Can I use pre-minced garlic from a jar? While fresh garlic provides the best flavor, jarred minced garlic will work in a pinch. Use about 1/2 teaspoon per clove called for in the recipe.
Q: What’s the best bread to use for garlic bread? A French baguette or Italian loaf works best. Look for bread with a soft interior and slightly crispy crust. Avoid very dense or very airy breads.
Q: Can I make this dairy-free? Yes! Substitute the butter with a high-quality vegan butter substitute and skip the Parmesan or use a plant-based alternative.
Q: How do I know when my garlic bread is done? The edges should be lightly golden, the butter completely melted, and when you press the center, it should feel warm and slightly springy.
Q: Can I use olive oil instead of butter? Absolutely! Mix 1/3 cup of good quality olive oil with your garlic and herbs for a Mediterranean twist. It will have a different flavor profile but is equally delicious.
Q: My garlic turned blue-green! Is it safe to eat? Yes, it’s safe. This sometimes happens due to a reaction between compounds in garlic and acids or minerals. It doesn’t affect the taste or safety.
Q: Can I make this in an air fryer? Yes! Air fry at 350°F for about 4-5 minutes for perfect results.
A Personal Note on Garlic Bread Memories
Some of my fondest childhood memories involve garlic bread. My grandmother would make a version with roasted garlic that would fill the house with the most incredible aroma. Even now, when I make this recipe, I’m transported back to her kitchen, watching her hands work the butter and garlic together, explaining that the secret was to be generous with both.
I’ve carried that lesson forward – never skimp on the good stuff. Food is about nourishment, yes, but it’s also about pleasure and connection. Something as simple as garlic bread can become a thread woven through family gatherings, casual dinners with friends, or even quiet evenings alone with a good book and a bowl of soup.

The Bottom Line
Garlic bread doesn’t need to be complicated to be extraordinary. This 15-minute recipe delivers consistently delicious results with minimal effort. It’s proof that some of the best dishes are the simplest ones – a reminder that we don’t always need fancy techniques or exotic ingredients to create food that makes people happy.
Whether you’re serving it alongside a fancy Italian dinner or using it to elevate a simple weeknight meal, this garlic bread recipe is bound to become a staple in your cooking repertoire. And remember, the measurements are guidelines – cooking is personal, so adjust the garlic, butter, and herbs to suit your taste. That’s the beauty of homemade food – you get to make it exactly how you like it.
Give this recipe a try, and I’d bet it will become your go-to garlic bread method. After all, why spend more time when 15 minutes is all you need for perfection?